Perform CRUD Operations in the Django Admin
What Is CRUD?
CRUD is an odd acronym from an earlier era of programming - a vintage example of programmer humor! 😆
It refers to the four operations that we tend to perform regarding data:
Create - where you insert new data to a database.
Read - where you retrieve data from the database (often so that you can display it to the user).
Update - where you change something about an existing piece of data and save the changes back to the database.
Delete - where you remove data from the database that is no longer needed.
So far, we have been creating objects in the Django shell and then reading them in our views so that we can display them in our pages. But we’ve yet to try updating or deleting objects.
In this chapter, we’ll look at all four of the CRUD operations and see how to perform them through a user interface.
Discover the Power of Django’s Admin Site
The admin site is one of the reasons I instantly fell in love with Django when I first used it. There’s no better way to explain this than to show it to you, so let’s dive right in!
First we need to create a user account for our site. In fact, we’re going to create a superuser - a user account that has permissions to do anything it wants.
The command-line utility has a subcommand for this. Open the terminal and type:
python manage.py createsuperuserFollow the instructions at the prompt to create your superuser. You don’t have to fill out an email address, but remember your password!
Next, we will tell Django that we’d like to manage one of our models in the admin site. As with most things in Django, this goes in a specific place: a file in your app directory called admin.py.
# listings/admin.py

from django.contrib import admin

# Register your models here.
Now, update the admin.py file so it matches the code below. By running admin.site.register(Band) , we are registering the Band model to the admin site, allowing us to manage it from there.
# listings/admin.py

from django.contrib import admin

from listings.models import Band

admin.site.register(Band)
Next, run the development server, and go to http://127.0.0.1:8000/admin/ in your browser:
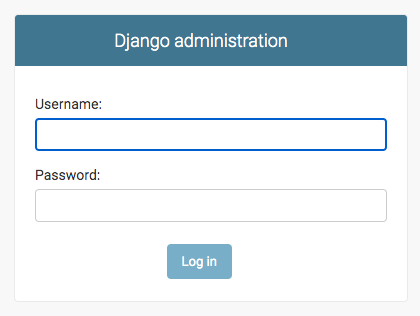
Log in with the user account you created earlier, and you’ll see:
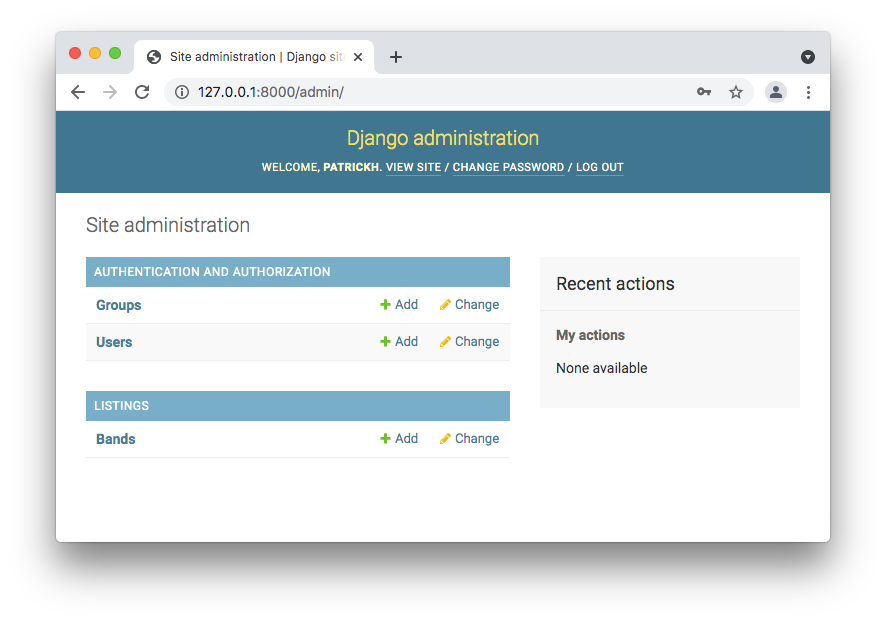
We’re now on Django’s admin site. From here, we can manage the various models we have registered with the admin site.
In this list, we can see our Band model (pluralized to “Bands”) under the heading “LISTINGS,” which is named after our app.
Now here’s the cool part. Click on the “+ Add” link for “Bands.”
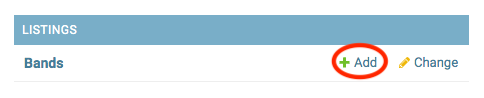
You’ll be presented with an automatically generated form for adding a new band to your database! This form has appropriate input types for each field (like a dropdown list for the genre field) and includes validation to ensure that the data submitted conforms to the constraints you’ve defined in your model.
Try clicking “Save” for an empty form now, and you’ll see it triggers validation errors for any fields for which we did not set blank=True :
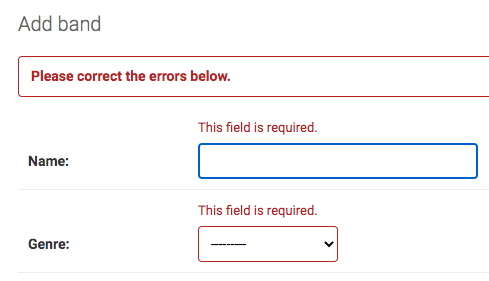
Now fill out the form with another favorite band of yours (preferably from one of the genres you’ve added!). Correct all of the validation errors, and click “Save” again.
You just performed the ‘C’ in CRUD: Create - because you inserted a new Band into the database.
Now you should have been redirected to a list of all the bands in our database:
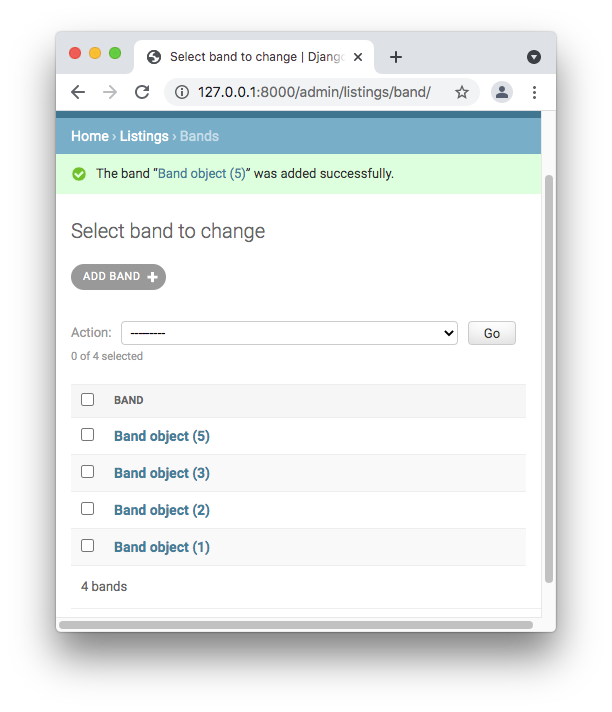
This list is an example of the ‘R’ in CRUD, Read, because you retrieved objects from the database in order to display them.
Click through to the top object, which will be the most recent - the one we just created, and you’ll see our object in detail, with all of the field values laid out in a form:
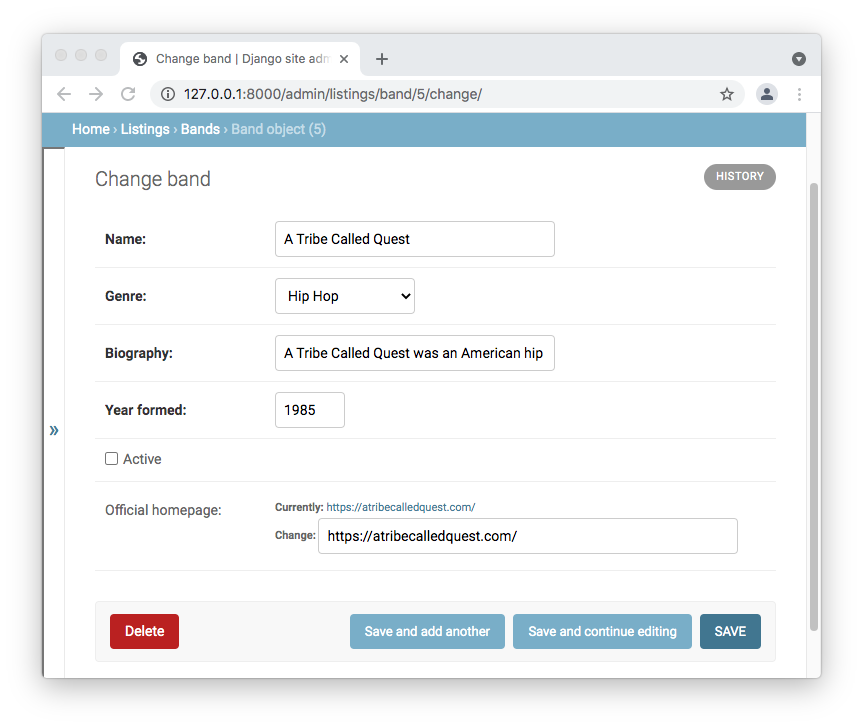
Edit one or more of the fields, and click “Save.”
In doing so, you just performed the ‘U’ in CRUD, Update, because you changed some of the fields of an existing object, and saved the values back to the database.
You should now have been redirected back to the list of bands.
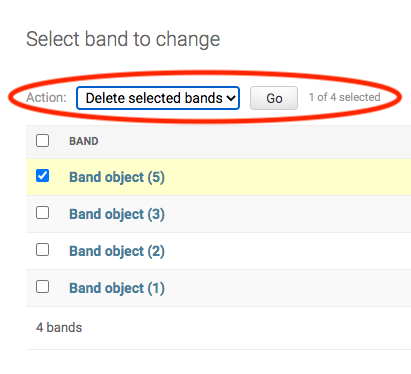
Now check the checkbox next to the top Band object. Then select “Delete selected bands” from the dropdown. Finally, click the “Go” button.
The admin site asks us to confirm - click “Yes, I’m sure”:
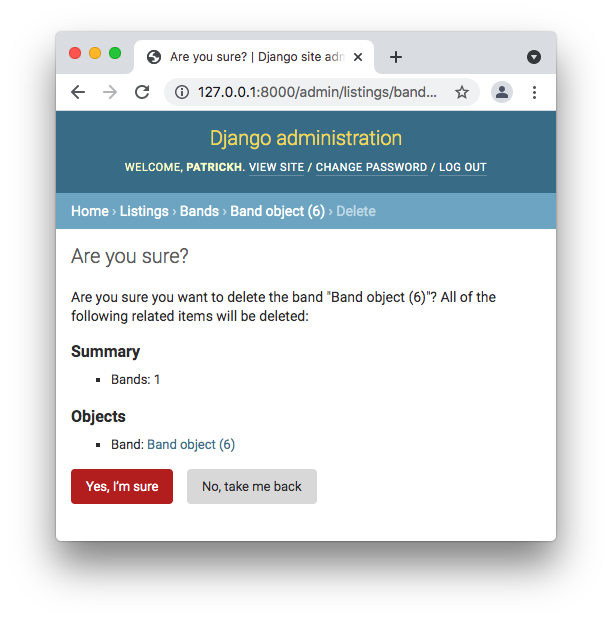
You just performed the ‘D’ in CRUD, Delete, because this band has been removed from the database and will no longer appear on our list.
This is cool, but what is the purpose of the admin site?
The admin site is where the various models in a Django project can be managed by, well, administrators! But who do we mean by that?
To begin with, the administrators will be you and the other developers on the project. But eventually, you may hand the project over to a client - perhaps the store owner or blogger - people who are not programmers and cannot use the Django shell to create new objects.
Non-programmers would be lost without an interface to perform CRUD operations. And you would have to spend considerable time building and testing that interface for them. That’s why you should be excited about this feature - because Django has built it for you!
Amazing! So does this mean I never have to build any forms of my own?
Not quite! While the admin site is very useful, remember that its primary audience is administrators, not end-users. It’s a back-end interface that offers far greater functionality than what end-users should have access to. It’s also very plain-looking.
Your end-users will expect to use forms that are styled like the rest of your site. You may also want to customize the position of a form within a page, exclude some fields, and make other UX customizations. For these reasons, you still need to learn how to build forms into your web app’s front end in later chapters.
Now you’ve accessed the admin site with me, watch this screencast to check your understanding.
Customize the Django Admin Site to Suit Your Needs
There are some customizations we can use to make the admin site work better for us.
Take another look at the list of objects at http://127.0.0.1:8000/admin/listings/band/:
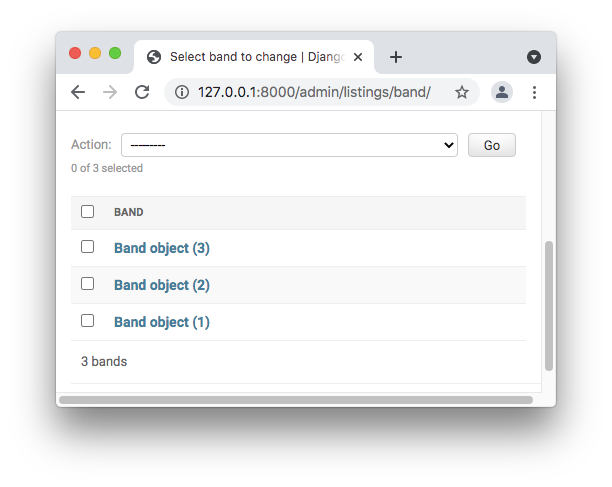
Wouldn’t it be better if, instead of displaying “Band object (id number),” we could display something more meaningful? How about the band’s name?
To do this, we can edit the string representation of the Band model by modifying it’s built-in method __str__ .
Open up models.py and add:
class Band(models.Model):
   …
   def __str__(self):
    return f'{self.name}'
And then we see:
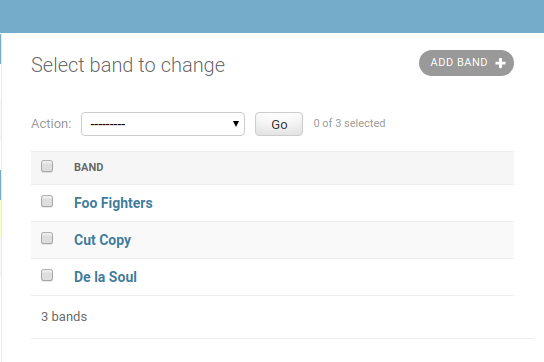
What if I want to show the genre and year the band was formed on this list display to?
You can do that!
Open up admin.py again and add or edit the commented lines:
# listings/admin.py

from django.contrib import admin

from bands.models import Band

class BandAdmin(admin.ModelAdmin):  # we insert these two lines…
   list_display = ('name', 'year_formed', 'genre') # list the fields we want on the list display

admin.site.register(Band, BandAdmin)  # we edit this line, adding a second argument
First, let’s see the results of what we’ve just done. Open http://127.0.0.1:8000/admin/listings/band/ once again:
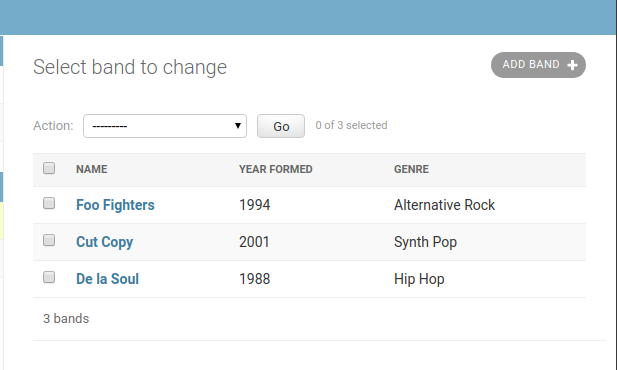
That’s a much nicer interface for our administrators!
Next, let’s break down what we did in the code to achieve this:
We modified how a
Bandis represented as a string using the__str__method.We created a class called
BandAdmin, inheriting fromadmin.ModelAdmin. We configure the way model objects are displayed in the admin using ModelAdmin classes.We gave
BandAdmina class attribute calledlist_display, and set it to the tuple('name', 'year_formed', 'genre'). This means we can see all of these fields when viewing the bands in the admin.Finally, we updated the call to
admin.site.registerin order to pass the newBandAdminclass to it. This final step is necessary to hook it all together.
Now You Try! Register a Model to the Admin Site, and Try the CRUD Operations
 Now I want you to register the
 Listing model (which you created in Part 2, Chapter 3) to the admin site, so that you can try out creating, reading, updating, and deleting some listings objects. You can edit your existing Listing objects so that they have reasonably correct values.
Also, use this opportunity to edit your existing Band objects on the admin site. In the last chapter, we gave them all the same genre, and an empty biography, but now you can correct this. You can find example biographies on Wikipedia!
Go over the chapter text, or the screencast, if you need any pointers.
Let’s Recap!
The Django admin site is a user interface designed for site administrators to perform CRUD operations on model objects manually.
You register your models so that they appear on the admin site. You can specify the fields that you want to be displayed in the list view.
To access the admin site, first create a superuser account with
python manage.py createsuperuser, and then log in at http://127.0.0.1:8000/admin/.
Now that you can perform CRUD operations in the Django admin, it’s time to link different models in the database using foreign keys.