Discover Create React App (CRA)
 Do you feel like you’re starting to master the basics of React? That’s great! Because in this part, we’re going to take things to the next level and build a complete app.
Understand the Importance of Automated Tools
You’ve learned how to use React and ReactDOM CDN links, and configure Babel in CodePen to create a React app quickly. However, this technique is rarely used by professional developers.
Instead, they use automated tools to create a codebase containing essential tools that have already been preconfigured. Some functionalities of these tools allow you to:
Manage different dependencies (libraries) used by an app.
Optimize code fetching in browsers.
Import CSS and images.
Manage different versions of JavaScript.
Make developing easier by refreshing the page when the code is modified.
Install and Launch CRA
Also created by teams at Facebook, Create React App is a tool that will help you to do everything just mentioned. There are other tools available (Next, Gatsby, Parcel, etc.), but Create React App remains the standard, especially for new React users.
Create React App allows you to generate a skeleton code for your app. It includes some preconfigured tools such as Webpack, Babel, and ESLint to guarantee the best development experience.
To begin, get into the folder where you want to create your project. For example, I’ve created a workflow folder that sits on the same level as Downloads, Documents, etc., which is where I file all my code projects.
To start the project:
npx create-react-app jungle-house
What does npx mean in all of this?!
There's no need to go into too much detail as you’ll only use it this once, but npx is the command recommended by Create React App for setting up a project without having to install CRA globally or locally.
It’s loading... ⏳⌛️⏳⌛️
Yay! You now have your first project created with Create React App!
Explore the Files
Now that you’ve set up your project, it’s time to get in there and start exploring the created files. You can get to the project with cd jungle-house on your terminal.
From there, you can open your preferred text editor (I’m a fan of VS Code, personally 😎) to take a look. Whenever you’re ready, let’s go through the files together in this screencast:
As you can see, you have three folders 🗂 :
node_modules: where all the dependencies for your code are installed. This folder can quickly become pretty large.public: where you’ll find yourindex.htmlfile and others relating to the online listing of your site.src: where the action happens. The essential content of the files that you create and modify will be here.
Now let’s look at the most important files:
package.json: located in your project root. Use this file to manage your dependencies (all of the tools you use to build your projects) and the scripts that you’ll run withyarn, etc. If you look at its contents, you’ll see some dependencies that you recognize: React and React DOM.Here you’ll find
react-scripts, created by Facebook, which you can use to install Webpack, Babel, ESLint, etc. to make your life easier.
In
/public, you’ll findindex.html. It is the template for your application. There are lots of lines of code, but do you see```<div id="root"></div>```? Just like in the chapters before, this is where you anchor the React app.In
/src, you’ll findindex.js, which we’ll use to set up our React app.Finally, in
/src, you’ll findApp.js, which is our first React component.
I'm seeing dependencies and devDependencies , but what’s the difference between the two?
dependencies are the dependencies you need for code to work, both locally and in production. However, you only need devDependencies in the development phase. Both are installed from your package manager (yarn), with the different options specified as follows: yarn add for dependencies and yarn add --dev for devDependencies .
There are two files that we won’t use directly, but which it’s a good idea to keep:
README.md, which you can use to generate an explanatory page if you put your code on GitHub, for example..gitignore, which specifies what should not be tracked with git (usually the largenode_modulesfile).
Learn Commands
When you find your project root, you can run yarn start , which will run your app in the development mode.
You’ll end up with something like this (but most likely with a different IP address):
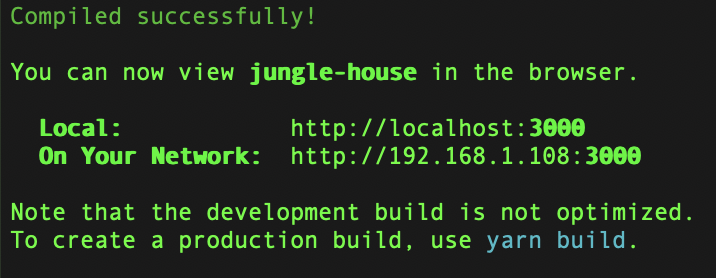
A tab should have opened in your browser with the URL http://localhost:3000/. If not, open it yourself.
And ta-da! 🥳
You should see the glorious React logo spinning in your browser!
Organize Your Code
Let's modify the codebase so that it better resembles our project. There are several ways of organizing your code, and it’s important to think about how to do it. Here we’re going to separate files according to type: components/style/images, etc.
We’ll start by creating a /components folder in /src , where we’ll put our components. Then drag App.js into it and change the import path in index.js .
Now let’s create the Banner from the previous chapter in a separate JavaScript file and call it banner.js .
function Banner() {
    return <h1>Jungle House</h1>
}

export default Banner Let's now now change the code in App.js by deleting the basic code and importing the Banner .
import Banner from './Banner'

function App() {
    return <Banner />
}

export default App
This gives us:
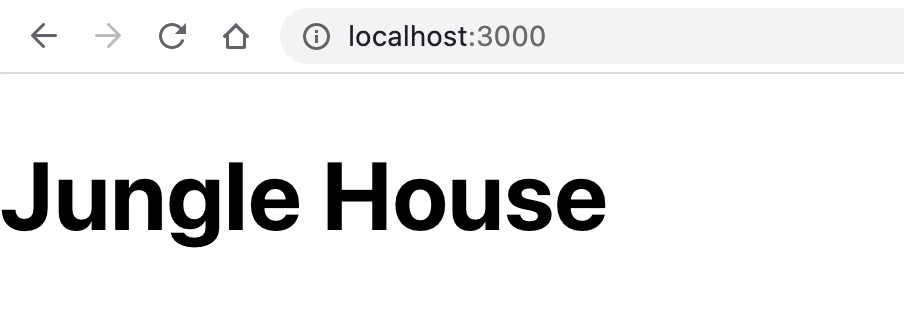
Congratulations! You’ve reused your code from the last chapter!
The tool we're using to import our components is Webpack:

Webpack makes importing a component easy with import . This tool is essential for linking files together so that the browser can interpret them. And with Create React App, you can install this with no configuration required. 😁
Give It a Go!
 You can begin this exercise using the codebase that we created together with Create React App.
Your mission is to import the Cart component that you created in the last chapter into a separate file in the /components folder.
You’ll find the solution to this exercise in the course’s GitHub repository on the P2C1-Solution branch.
Let’s Recap!
Developers use automated tools to make developing easier.
Create React App (CRA) is a toolbox created by Facebook that remains the standard for setting up a React project.
Projects created using CRA will always have:
An
index.htmlfile, which is the template where a React app will live.package.json, which lists dependencies and scripts.index.jsin which our React app is set up and joined to the HTML.
CRA runs with the help of a package manager (in this course,
yarn).Webpack allows for the simple importing of files between one another.
Did you enjoy creating your app with CRA? Want to make things a bit more stylish? See you in the next chapter!