Filter Data in a DataFrame

Let’s consider the following scenarios:
For one of our sales offerings, we only want to select the males in our DataFrame.
We want to identify customers with a high income, which we’ll do by selecting all those who earn more than $x per month.
We want to identify so-called “high-risk” customers, i.e., those with a debt-to-income ratio above the recommended 35%.
Up to this point, we’ve been able to select specific columns and manipulate them however we like. But for the above examples, we can’t just manipulate the columns. We need to apply a specific condition to select only the relevant rows.
This is known as restriction or filtering. We can use Pandas to do this, giving us total control of our data. Let’s take a look at it together.
Select Using Integer Positions
The first type of selection is based on integer positions. We use the.ilocmethod to do this.
The .iloc method uses the following syntax: my_dataframe.iloc[index_row, index_column] .
Let’s look at a real-life example. We want to select the name of the first customer in our database. As it’s our first customer, the row integer position will be 0. We want to select their name, which is the third variable in our DataFrame, so the column integer position will be 2. Yes, that’s right! Column integer positions also start at 0. So, the selection code would be:

Great! That’s the name of our first customer.
Now, what if I wanted to select the names of the first 10 customers. How would I do that?
We can use the : operator to select the desired range, just as we do with arrays. Here are some examples:
# select the name of the first 10 customers:
customers.iloc[:10, 2]
# select the gender of the first 10 customers:
customers.iloc[:10, 3]# select all columns for the first 10 customers:
customers.iloc[:10,:]# select email address and name for the next 10 customers:
customers.iloc[10:20, 1:3]# select email address and gender for the final 10 customers:
customers.iloc[-10:, [1, 3]]The iloc method can be useful in certain cases, but overall it’s quite limited. It’s not suitable if you want to select rows based on a certain condition (e.g., all customers with income above $x). In addition, you need to know the actual integer positions of the different columns. It’s fine when you only have up to five or six columns, but it becomes much trickier when your dataset has dozens of columns.
There’s another method similar to iloc that enables you to overcome these limitations, and that’s the.locmethod.
Select Using Conditions
To be honest, DataFrames have numerous methods, as you’ve probably realized. But, out of all of them, there is one that you’ll use time and time again, and that’s the.locmethod.
This method uses the following syntax:
my_dataframe.loc[ condition on rows, column(s) ]
At first glance it looks really simple, but we’ll see that this syntax can quickly become complex in practice, although it does offer much greater flexibility. This is THE method that will probably meet around 90% of your requirements when selecting data. Where did I pluck that figure from? Well, okay, I’ll admit that it’s my personal opinion! But let me show you why I’m so sure.
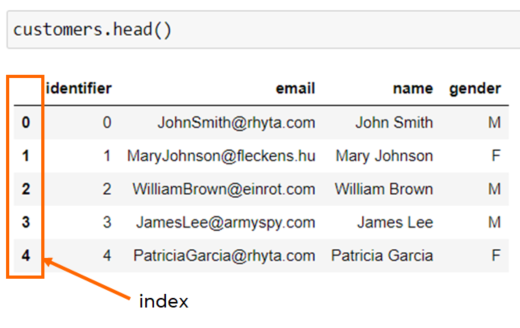
Another option for the .loc method is selection by label. Before I go any further on this, let me just mention the difference between label and integer position, which are both types of indexing. Row and column indices, as mentioned before, represent the integer position of an element within a table. Labels, on the other hand, correspond to a value associated with each row. This is what you see on the left-hand side of your DataFrame:
By default, they actually match the integer position index. But they don’t have to be numeric. For example, the name of the person could be set as a label if we know that there will be no duplicates.
Let’s perform a simple sort to show the difference between integer position and label-based indexing:
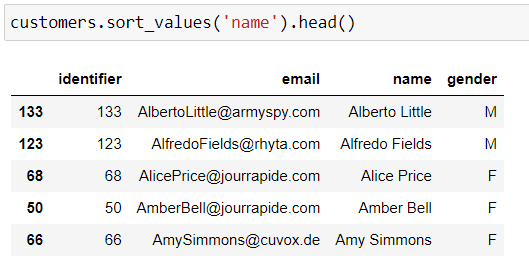
This is quite interesting, because if you look at our first row, it has a label index of 133. But it’s the first row, so its integer position is 0!
I think you’re probably starting to understand the difference. The integer position relates to the transactions carried out. An individual might take integer position number 1 at a certain point, and an entirely different one depending on how the data is sorted. The label, however, is integral to the row within a DataFrame. Whatever operations you perform—sorting, deleting, etc.—the label index will always be the same! The only condition is that each row must have a unique label. In other words, the same value must not appear more than once within an indexed dataset, i.e., you can’t have two labels with value 0.
Why are you telling me all this?
Well, because the .loc method enables you to use labels to select within a DataFrame.
Test it out with the following lines of code:
display(customers.loc[0:10,:])
display(customers.iloc[0:10,:])After performing certain operations, it’s sometimes a good idea to reset the indices. In the next section, we’ll see a practical example where it’s actually necessary. You can do this using the .reset_index() method:
# creation of a DataFrame sort to mix up the index sequence
df_temp = customers.sort_values('name')
display(df_temp)
# reset_index:
display(df_temp.reset_index())# reset_index without retaining the old indices:
display(df_temp.reset_index(drop=True))Edit Your Selection
You can also use the .iloc or .loc methods to modify an existing DataFrame, as we did with columns. It’s actually a more useful option than we’ve seen so far, because we can edit a specific part of a DataFrame. I suggest you watch this video, which brings it all together:
So, how about we put all this into practice? Let’s go!
Over to You!

Background
Our company’s loan department manager has put together some specific requirements. They want you to be able to process the data to provide some detailed information.
Guidelines
You will need to apply all of the selection processes outlined above to be able to fulfil these different requests:
The maximum permitted debt-to-income ratio is 35%. Can you tell me how many people have exceeded this threshold?
Same question, but this time only for the Detroit branch.
To help with future loan application processing, could you add a variable called risk, so we can easily identify higher risk customers?
How many vehicle loans have been granted? What is the average total cost of these loans?
What is the total monthly profit obtained by the Chicago branch?
Ready? Let’s get started on this exercise!
Check Your Work
Once you’ve finished, go ahead and check your answers with the solutions.
Let’s Recap
There are two ways to accurately select entries within a DataFrame:
The
.ilocmethod allows you to select using integer-based index positions. The syntax is:my_dataframe.iloc[ row index(ices) , column index(ices) ].The
.locmethod is used to select using conditions and column names. The syntax is:my_dataframe.loc[ row condition, column(s) ].
The row condition is the condition that will be tested for each row. A row is retained in the selection process if it meets this condition. The condition can be a combination of several conditions separated by logical “and” (
&) and “or” (|) operators.Labels are the values that are intrinsically associated with each row. If a sort or any other operation is performed, a row, regardless of its position in the DataFrame, will always have the same label index. You can reset the index using the
.reset_indexmethod.The
.locmethod can also be used to update the selected part of the DataFrame.
Now we’re up to speed with selecting using Pandas, how about we go a step further in Pandas data manipulation and figure out how to aggregate our data?
