Include Multiple Forms on a Page

Include Multiple Different Forms on the Same Page
Now that we have looked at creating multiple model instances with a single form submission, let’s look at including different forms with separate submissions on the same page.
To demonstrate this, we will build a page from which to edit and delete a blog post.
Step 1: Create the Forms
To delete the Blog instance, create a new form, DeleteBlogForm . To edit the Blog instance, use the already created BlogForm .
However, we need a way to differentiate between these two forms when deciphering the POST request data in the view.
To achieve this, attach a hidden field to each respective form. Here's how:
# blog/forms.py

class BlogForm(forms.ModelForm):
    edit_blog = forms.BooleanField(widget=forms.HiddenInput, initial=True)

    class Meta:
        model = models.Blog
        fields = ['title', 'content']


class DeleteBlogForm(forms.Form):
    delete_blog = forms.BooleanField(widget=forms.HiddenInput, initial=True)
You attached a field edit_blog and delete_blog to the BlogForm and DeleteBlogForm forms, respectively. These fields use the HiddenInput widget and won’t be seen by the user on the front end. The choice of the field type and the initial value is somewhat arbitrary, as we will just be checking for the presence of the field in the view.
Step 2: Include the Forms in a View
Now that we have the forms, let’s handle them in a view.
First, create an edit_blog view without the handling for a POST request.
# blog/views.py

@login_required
def edit_blog(request, blog_id):
   blog = get_object_or_404(models.Blog, id=blog_id)
   edit_form = forms.BlogForm(instance=blog)
   delete_form = forms.DeleteBlogForm()
   if request.method == 'POST':
       pass
   context = {
       'edit_form': edit_form,
       'delete_form': delete_form,
   }
   return render(request, 'blog/edit_blog.html', context=context)
Since adding the hidden fields to the forms, you can now check which form is being submitted by checking for the presence of that field in the POST data. Then just handle the form as usual.
@login_required
def edit_blog(request, blog_id):
    blog = get_object_or_404(models.Blog, id=blog_id)
    edit_form = forms.BlogForm(instance=blog)
    delete_form = forms.DeleteBlogForm()
    if request.method == 'POST':
        if 'edit_blog' in request.POST:
            edit_form = forms.BlogForm(request.POST, instance=blog)
            if edit_form.is_valid():
                edit_form.save()
                return redirect('home')
        if 'delete_blog' in request.POST:
            delete_form = forms.DeleteBlogForm(request.POST)
            if delete_form.is_valid():
                blog.delete()
                return redirect('home')
    context = {
        'edit_form': edit_form,
        'delete_form': delete_form,
    }
    return render(request, 'blog/edit_blog.html', context=context)
Step 3: Add the Template
Now that the view is built, let’s work on the template.
# blog/templates/blog/edit_blog.html
{% extends 'base.html' %}
{% block content %}
    <h2>Edit Blog</h2>
    <form method="post">
        {{ edit_form.as_p }}
        {% csrf_token %}
        <button type="submit" >Save</button>
    </form>
    <hr>
    <h3>Delete Blog?</h3>
    <form method="post">
        {{ delete_form }}
        {% csrf_token %}
        <button type="submit" >Delete</button>
    </form>
{% endblock content %}
Including the hidden fields ensures that each form only gets handled when you intend to submit it. You can now include any amount of forms on the same page.
Step 4: Add the URL Pattern
Now add the URL pattern for the edit blog page.
# fotoblog/urls.py
urlpatterns = [
    …
    path('blog/<int:blog_id>/edit', blog.views.edit_blog, name='edit_blog'),
]
Step 5: Link to the Edit Blog Page
And finally, add a link to the edit blog page from the view blog page.
# blog/templates/blog/view_blog.html
{% extends 'base.html' %}
{% block content %}
   <h2>{{ blog.title }}</h2>
   <p><a href="{% url 'edit_blog' blog.id %}">Edit Blog</a></p>
   <img src="{{ blog.photo.image.url }}">
   <p>{{ blog.photo.caption }}</p>
   <p>{{ blog.content }}</p>
{% endblock content %}
And we’re done! Let’s see how the edit blog page looks.
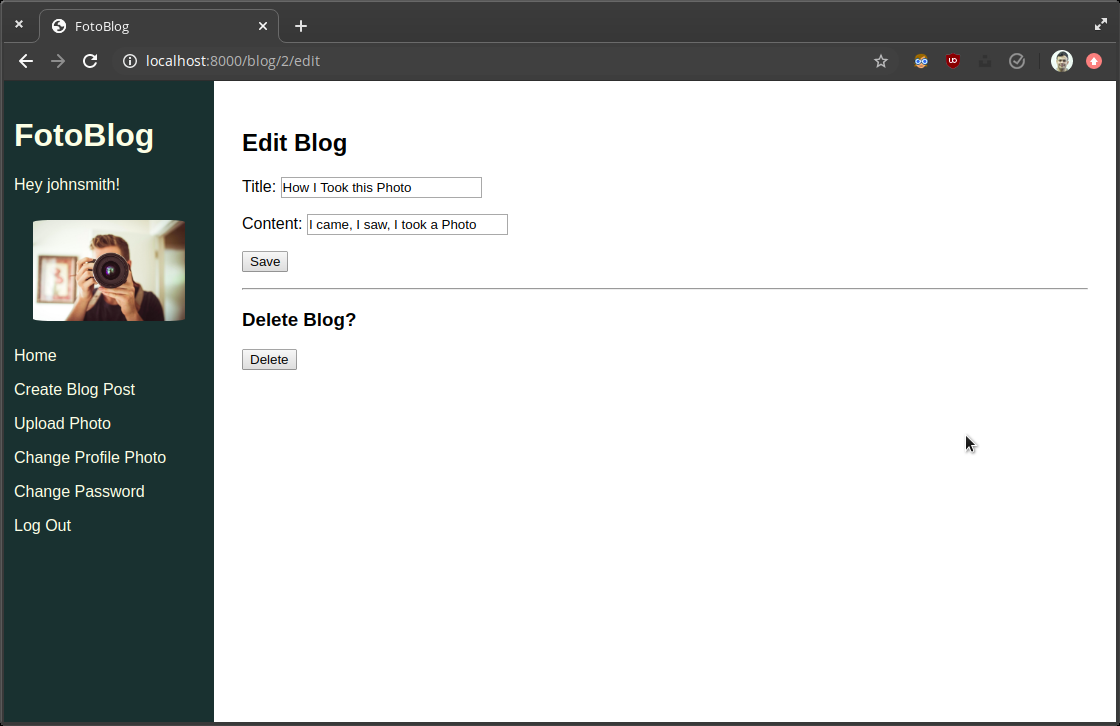
It looks good. Notice how there are two separate submit buttons on the page? Those two buttons will submit our two different forms. Play around with the functionality yourself.
Include Multiple Instances of the Same Form With Formsets
You now have two techniques for including different forms on the same page. You can either submit them simultaneously or separately, but what if you want to include the same form multiple times on a page?
You can use formsets. Let's build a page that allows a user to upload multiple photos at the same time.
Step 1: Create a Formset in a View With formset_factory
You already have PhotoForm that can create Photo models. You can reuse this form rather than creating a new one.
To generate a formset using this form, use the formset_factory method, found in django.forms . This method takes the form class as its first argument and then another argument, extra , which defines how many instances of the form you want to be generated. This “factory” function returns a class , which you will then need to instantiate in the view.
In practice, that looks like this:
# blog/views.py
from django.forms import formset_factory

@login_required
def create_multiple_photos(request):
    PhotoFormSet = formset_factory(forms.PhotoForm, extra=5)
    formset = PhotoFormSet()
    if request.method == 'POST':
        pass
   return render(request, 'blog/create_multiple_photos.html', {'formset': formset})
To process the POST data, you can run the is_valid() method on the formset just like you can on a form. Then you can iterate through the forms in the formset using a loop and handle them as you usually would. The formset will not be invalid if individual forms are empty, so let's check if the form has data before saving, like so:
# blog/views.py
@login_required
def create_multiple_photos(request):
    PhotoFormSet = formset_factory(forms.PhotoForm, extra=5)
    formset = PhotoFormSet()
    if request.method == 'POST':
        formset = PhotoFormSet(request.POST, request.FILES)
        if formset.is_valid():
            for form in formset:
                if form.cleaned_data:
                    photo = form.save(commit=False)
                    photo.uploader = request.user
                    photo.save()
            return redirect('home')
   return render(request, 'blog/create_multiple_photos.html', {'formset': formset})
This will save all of the forms and then redirect us to the homepage. Now let’s add a template.
Step 2: Create the Template
There are two methods of including a formset in a template. The simplest way is to include the formset as you would a form.
# blog/templates/blog/create_multiple_photos.html
{% extends 'base.html' %}
{% block content %}
   <h2>Add Photos</h2>
   <form method="post" enctype="multipart/form-data">
       {{ formset.as_p }}
       {% csrf_token %}
       <button type="submit" >Save</button>
   </form>
{% endblock content %}
You may find that you want to render each form in the formset individually. To do this, you must remember to include {{ formset.management_form }} in the <form> tags. The management_form doesn’t include anything the user will see on the front end but includes some metadata that Django needs in order to process the formset, like the number of forms in the formset.
To include a formset on a page while handling displaying each form, you can put:
# blog/templates/blog/create_multiple_photos.html
{% extends 'base.html' %}
{% block content %}
   <h2>Add Photos</h2>
   <form method="post" enctype="multipart/form-data">
       {{ formset.managment_form }}
       {% csrf_token %}
       {% for form in formset %}
           {{ form.as_p }}
       {% endfor %}
       <button type="submit" >Save</button>
   </form>
{% endblock content %}
Step 3: Add the URL Pattern
Again, you have to add the URL pattern.
# fotoblog/urls.py
urlpatterns = [
    …
    path('photo/upload-multiple/', blog.views.create_multiple_photos,
    name='create_multiple_photos'),
]
Step 4: Add a Link From the Sidebar
And a link from the sidebar.
# templates/base.html
...
<p><a href="{% url 'photo_upload' %}">Upload Photo</a></p>
<p><a href="{% url 'create_multiple_photos' %}">Upload Multiple Photos</a></p>
<p><a href="{% url 'upload_profile_photo' %}">Change Profile Photo</a></p>
...
And that’s it! You can now include multiple instances of the same form on the same page. Let’s see how it looks.
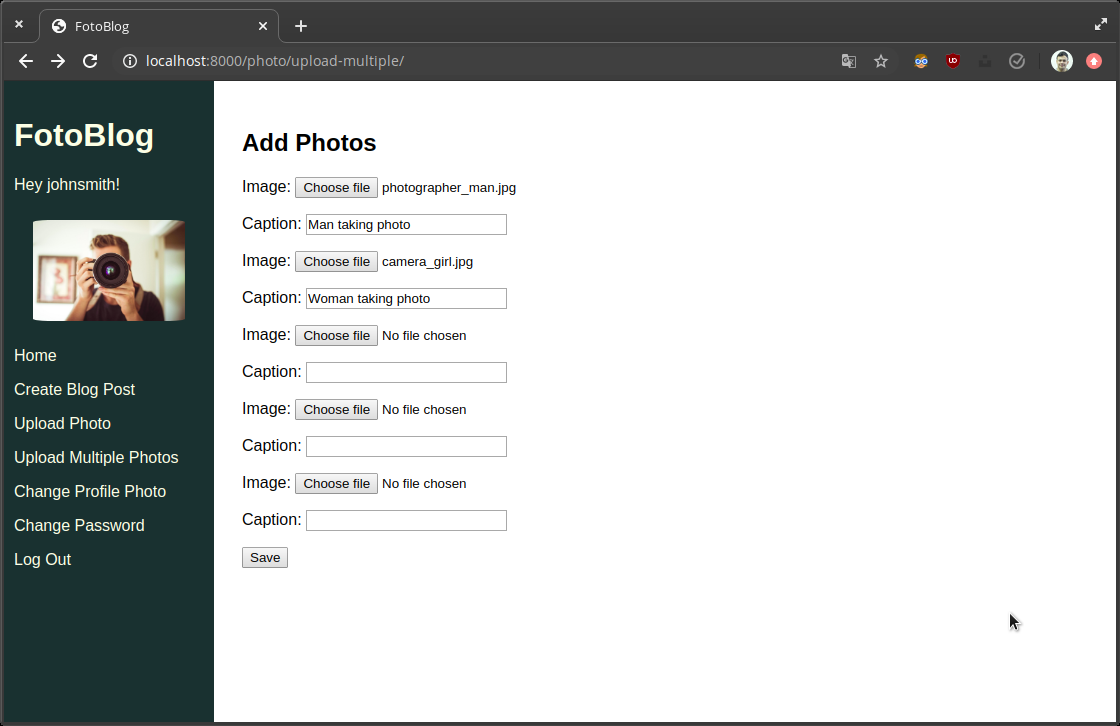
Test it out!
Let's Recap!
You can handle multiple separate forms on a single page by including a hidden field identifying the submitted form.
You can use formsets to create multiple different instances of the same form on a single page.
Now that you can handle multiple forms in a single view, you’re ready to look at extending models with custom methods.
