Update and Save Infrastructure Components
The monitoring team’s email is quite worrying. It tells you to update your systems as quickly as possible, so you start making a list of services that might be concerned, such as RDS and EC2.
Discover Updates in Amazon RDS
Amazon takes care of updating the operating systems of the machines hosting your database and security updates for the database engine.
All you have to do is make sure maintenance is planned for a time when there won’t be any traffic on your database to prevent slow running or service interruptions.
Update Machines in an Auto Scaling Group
Create a New Disk Image
Unlike in RDS, Amazon doesn’t manage the operating systems of EC2 instances. It only manages the virtualization of the underlying system, meaning that you have to update the operating system and the application yourself.
The challenge is to update the entities within an Auto Scaling group without causing a service interruption. There are several stages involved in this—let’s look at them.
First, you need to create a new, updated disk image. To do this, take the current disk image, deploy it in a machine, perform the update, and then create a new image.
In the EC2 service, click on Instances, then Launch instances. In the tab My AMIs, select your machines’ current image, then follow the steps to create an EC2 machine as in part 3 to connect to the instance.
Once you’re in the instance, you can launch your update commands, for example:
sudo yum update
Give the updates a few moments to install, then stop the machine with Actions > Instance state > Stop. Now you’re going to create a new disk image, like earlier, containing these updates. In the description of the instance, click on /dev/sda1 next to Root device, then on your volume vol-xxxx next to EBS ID.
As earlier, create a snapshot with Actions, then Create Snapshot. In the snapshot management panel, click on your snapshot, then select Actions and Create image. Choose a name, and click Create.
Now you have a new image next to the old one:
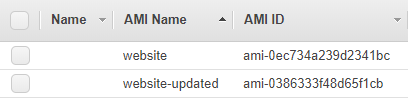
It’s time to update your machines by modifying the launch group.
To avoid service interruptions, AWS doesn’t stop the “obsolete” machines after the launch group is updated—you have to tell the Auto Scaling group to start the updated machines and destroy the old ones to return to normal capacity.
Update the Machines
As you saw earlier, it’s impossible to update a launch group. Since you automated everything with CloudFormation, all you need to do is update the image ID of your stack, and the change will be made.
In the CloudFormation control panel, click on your stack, then on Action > Update stack. You haven’t changed the content of your stack, but you’re going to change one of its parameters. So, click on Use current template, and in the next panel, replace AmiIdentifier with your new AMI number. Then click Next, Next again, and Update Stack (you’re used to this now  ).
).
CloudFormation will show you the change it’s going to make:

CloudFormation does several things:
It creates a new launch group with a new image.
It changes the Auto Scaling group reference to point to your new launch group.
It deletes the old launch group.
Once this is complete, you’ll have a launch group that can start machines with the new image. You now need to tell AWS to start the updated machines and gradually destroy the others by doing the following steps:
In your Auto Scaling group’s configuration, increase Desired capacity. Wait a few seconds for AWS to start your new machine.
Don’t forget to write down the IDs of the old and new instances.
Go to the configuration of your target group. You should see two machines: the old one and the new one.

To avoid disconnecting an active user in the middle of a request, you need to tell the load balancer to stop sending traffic to the old instance so it can be deleted. To do this, click Edit, then select your old instance and click Remove, then Save.
The instance will switch to the status draining, which means that the target group is waiting for requests to complete before it stops considering the instance healthy.

Wait a few minutes, then go to Instances to terminate this machine, which is now disconnected from the outside world, by selecting Action > Instance State > Terminate. The auto scaling group will react and start a new machine to replace it when you terminate the instance. This new machine will have the new image, as the launch group has been changed.
You now have two updated machines, so you can reduce the size of the Auto Scaling group if you don’t need both instances, and one of them will be destroyed. There was always at least one healthy machine capable of receiving network traffic during the whole procedure, meaning that an uninterrupted service was maintained while changing the machine system.
A Sudden Crash
It’s 5:55 p.m. on Friday, typically a time when something always goes wrong! Normally, this involves one of the system users making a blunder that they need you to fix urgently before the weekend; otherwise, life on Earth will end. True to form, you see Fred from accounts tiptoeing towards your desk. While closing the monthly accounts, he accidentally deleted several lines from the database, including the line corresponding to your salary.
However accidental his mistake may have been, you’re now in a situation where, on a Friday at 5:55 p.m., you have to help him, or you won’t be getting your pay any time soon. So you resign yourself to sorting out the mess he’s made.
Restore RDS Backups
You’ve configured automatic backups in Amazon RDS, and now’s the time to use them. Restoring backups of a database is very easy in AWS. All you have to do is go to the RDS service and click on Snapshots. You’ll see a list of your backups like this:
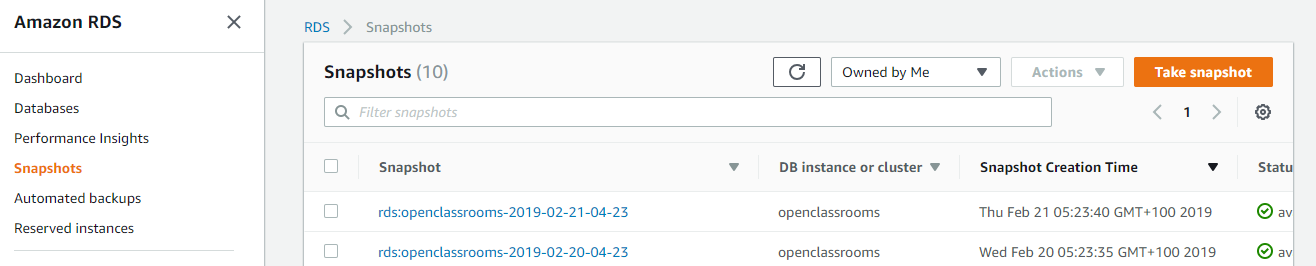
Click on the snapshot to be restored, and in Action, click Restore Snapshot. The database creation panel will appear. Select t2.micro for the database size, leave the other default parameters and click on Restore DB Instance.
AWS will launch a database using this backup. You can then do one of two things:
Connect your application to the new database.
Rename the new database, so it replaces the old one.
In this case, the application Fred uses is very cumbersome and takes a long time to start. Therefore, you’re going to change the entry points from the healthy backup to the current database:
Click on the old database, click on Modify, and change the name (add the prefix “old,” for example).
Choose Apply immediately, so the changes are carried out immediately, not during planned maintenance time.
A Potential unexpected downtime warning will appear, as when you rename a database. It takes around 10 minutes to create the new endpoint. In this case, it doesn’t matter, as Fred has broken the database, and it’s currently unusable.
Click on Modify DB Instance.
The database changes to the status Renaming:

We’re now going to take the healthy database and rename it to the old database:
Click on the healthy database and click Modify.
Change its name to the name of the old database.
As before, choose Apply Immediately.
Click on Modify DB Instance.
After a few minutes, the healthy database will replace the old one, and Fred can get back to paying you your salary. You’ve certainly earned your weekend!
Let’s Recap!
You don’t need to take care of system updates in Amazon RDS—this service is managed for you.
To update your machines in an auto scaling group, you first need to create a new Amazon image or AMI. Then you can change the launch configuration and switch your machines over.
You can use automatic or manual snapshots created previously to restore RDS backups.
You can change the name of databases to switch between them.
Switching between databases by renaming them causes a service interruption.
You’ve Reached the End of This Course!
In this course, you learned to build a network in the cloud, deploy your systems, and maintain your infrastructure. Throughout the course, you learned to automate the creation of your resources in the cloud.
You can now:
Identify the concept behind cloud networks and systems and the issues linked to them.
Build and automate a cloud network, including deploying a VPC network in the AWS cloud via the web interface and CloudFormation.
Create and automate a network of machines in the cloud, including deploying a group of machines on your network and implementing an internet-facing load balancer managed by AWS on your machines.
Maintain your cloud network to keep it fully operational, including updating your system, consulting the metrics of your machines via a dashboard, creating an alarm for certain metrics in the AWS cloud, and restoring a database backup.
