Establish Communication on Your Network
You’re now going to add gateways so that your network can communicate with the outside world.
Create a Gateway
The long-awaited moment is here—you’re now going to link a gateway to your VPC!
But what is a gateway? What does it do?
AWS uses gateways to communicate with the outside world. There are two types of these:
Internet gateways, which allow network traffic to be routed in and out of your VPC. Internet gateways support IPv4 and IPv6.
Egress-only gateways, which allow network traffic to be routed only in an outbound direction from your VPC. These can be used as an alternative to creating a NAT instance or NAT gateway. Egress-only gateways only support IPv6.
So, how do you create a gateway?
Click on Internet Gateway.
Click on Create Internet Gateway.
Give your gateway a name.
Click Create.
Click Close.
And that’s it! Easy, wasn’t it? However, your gateway will be detached, like the one below.

What does that mean?
When a gateway is detached, it means it’s not connected to a VPC. In other words, it’s useless, as it’s not attached to any virtual network. You need to attach it to the VPC we created earlier. To do this:
Click on the gateway you’ve created.
Click on Action and choose Attach to VPC.
Select your VPC from the drop-down list.
Click Attach.
Your gateway is now attached:

Create an Elastic IP
What is an Elastic IP?
An AWS Elastic IP is a public IPv4 address accessible via the internet. Once allocated, this IP address can be considered static—you’ll keep it until you decide to de-register it, at which point it will be allocated to another person requesting this type of address.
Why create an Elastic IP address?
In AWS, if you create a NAT gateway, you have to link it to an elastic IP. For NAT instances, this isn’t mandatory but strongly recommended. The main advantage of elastic IP addresses is that they provide a stable IP for any whitelists in your network proxies, as this will be the outbound IP address visible behind the NAT gateway for machine traffic.
How do I do it?
Follow these steps:
Click on Elastic IPs on the left-hand side.
Click on Allocate Elastic IP address.
Click on Allocate.
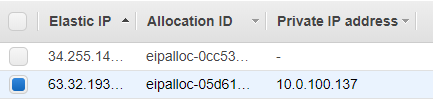
Check a new IP address is displayed.
Create a NAT Gateway
Wait... what does NAT actually mean?
NAT stands for network address translation. It’s a mechanism that links IP addresses to each other.
So how does this work in AWS?
In AWS, address translation is only possible with IPv4 addresses (for the moment, anyway). There are two ways to translate network addresses:
Install a NAT instance within a public subnet. A NAT instance is a machine that accepts traffic from your subnet and forwards it to the internet.
Link a NAT gateway to a public subnet. A NAT gateway is a NAT instance managed by AWS and is horizontally scaled.
Now you’re going to create a NAT gateway in AWS to allow future machines on your private network to communicate with the internet whenever they need:
On the left-hand side, click on NAT Gateway.
Click on Create NAT Gateway.
Choose one of your public subnets. You won’t be able to see whether it’s public or private in the interface, so you’ll need to consult the IDs of the subnets you created to identify which one should be linked, as below:

Associate your new Elastic IP with the subnet, and click Create NAT Gateway.
Wait for the gateway to become available (this might take a few minutes).
So now we’ve finished with NAT?
Not yet! Let’s take a minute to look back over what we’ve done.
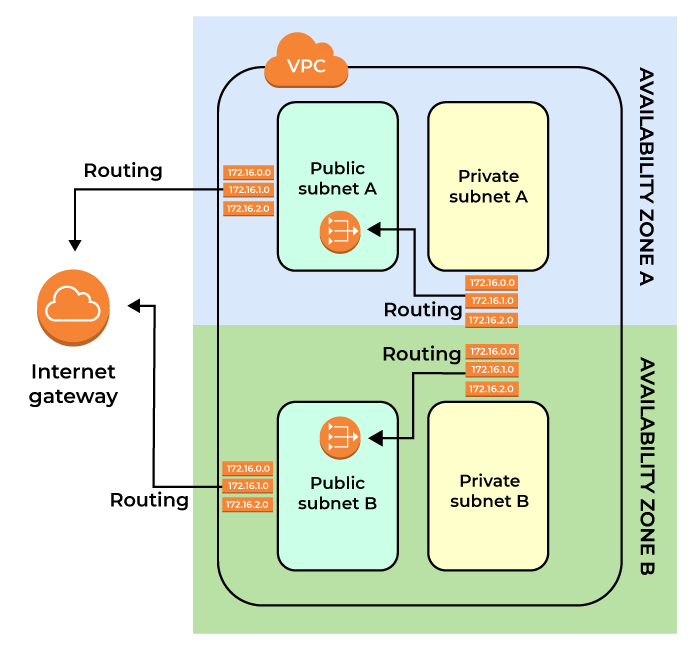
You now have a VCP with four subnets:
A private subnet in Availability Zone A.
A private subnet in Availability Zone B.
A public subnet in Availability Zone A.
A public subnet in Availability Zone B.
Attached to your VPC or subnets, you also have:
An Elastic IP address.
A NAT gateway linked to the IP address and the subnet of Availability Zone A.
It doesn’t look like anything’s missing…
But it is! Your NAT gateway isn’t redundant.
NAT gateways aren’t a regional component in Amazon (as internet gateways are, for example). Think of them as a NAT instance managed by AWS, but which are not designed as highly available by default, as they’re located in only one Availability Zone.
Follow the steps to create an Elastic IP and create a NAT gateway again, creating the gateway in the second public subnet. You should end up with something like this:

Configure Routing
You now have all the components, but you need to connect them to each other. To do this, you’re going to configure the route tables.
What’s a route table?
In a network, traffic doesn’t turn up at the right destination by magic—it uses route tables to find its way through the different parts of the network. To learn more, take a look at the section on routing in the course Set Up TCP/IP Networks.
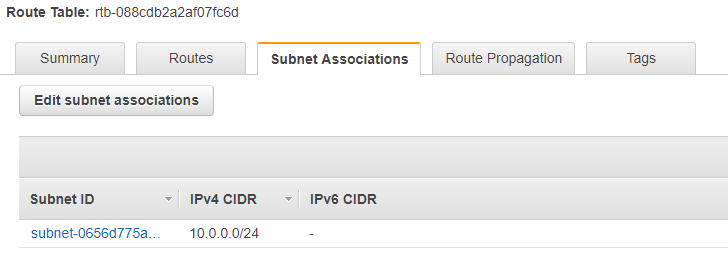
If you’re already familiar with network concepts outside of AWS, you’ll be pleased to know that this works in exactly the same way! By default, a route table is associated with your VPC and propagated to all subnets, as shown by the interface:

You’re going to create the following:
A route table for the private subnet of Availability Zone A, directing outbound traffic to the NAT gateway of the public subnet of Availability Zone A.
A route table for the private subnet of Availability Zone B, directing outbound traffic to the NAT gateway of the public subnet of Availability Zone B.
A route table for the public subnet of Availability Zone A, directing outbound traffic to the internet gateway.
A route table for the public subnet of Availability Zone B, directing outbound traffic to the internet gateway.
It’s important to make sure the gateways correspond to the private subnets of their Availability Zone, for example:
Outbound traffic from the private subnet of Availability Zone A must be routed to the Availability Zone A gateway.
Outbound traffic from the private subnet of Availability Zone B must be routed to the Availability Zone B gateway.
The reason for this is simple: if one Availability Zone becomes temporarily unavailable, the private instances of the remaining zone still need to be able to access the internet via a functioning gateway.
So how do I do it?
You need to take great care here, as routing mistakes can lead to networks that don’t work. Here are the steps to follow:
Click on Route Tables on the left-hand side.
Click on Create route table.
Choose a name and select your VPC, then click Create route table.
Then select the tab Subnet Association.
Click on Edit subnet associations.
Select private subnet A.
You should see something like this:
Now click on the Routes tab.
You’ll see that you already have a route that points to Local. This means that all addresses with a destination within the IP range 10.0.0.0/16 will be routed within the VPC. You’re now going to add a route to indicate that external addresses should be directed to your gateway:
Click on Edit routes and then Add route.
Enter the value 0.0.0.0/0 in the Destination column and enter the ID of the zone A NAT gateway as the target.
Click on Save routes. In the table, the address 0.0.0.0/0 now designates all IPv4 traffic.
Does that mean it will all be directed to the NAT instance?
No, it doesn’t. A route table is a set of rules that are analyzed in a specific order. Here, the rule “routing within the VPC” is executed before the rule “NAT routing,” so the route table will first try to see if the IP address is a VPC IP before directing it to the NAT gateway.
The order of priority of the rules in the route table is detailed in the AWS documentation on route tables. A general point is that the most specific rule is analyzed before the most general rule.
For example, if there’s a rule for just one IP (in /32), a rule for a subnet (in /24), and a general rule (in /0), they’ll be analyzed in this order:
Is the destination IP x.x.x.x/32?
Is the destination IP x.x.x.0/24?
Is the destination IP 0.0.0.0/0?
Have we finished?
Not yet! You’ve only created and associated one route table so far. Now, go through all the steps again to create the following:
A route table for private subnet B, containing:
A 0.0.0.0/0 rule pointing to the NAT gateway of zone B
A default 10.0.0.0/16 rule pointing to Local
A route table for public subnet A, containing:
A 0.0.0.0/0 rule pointing to the internet gateway
A default 10.0.0.0/16 rule pointing to Local
A route table for public subnet B, containing:
A 0.0.0.0/0 rule pointing to the internet gateway
A default 10.0.0.0/16 rule pointing to Local
Once you’ve finished, you should have the following infrastructure:
Let’s Recap!
Subnets communicate with the outside world using internet gateways.
AWS provides a managed device for translating addresses (NAT), called a NAT gateway.
Route tables allow you to configure the way networks communicate.
You can associate one or several subnets with a route table.
An internet gateway must be attached to the VPC.
To create a NAT gateway, you need an Elastic IP address.
To create a high availability network, you should duplicate your infrastructure across at least two Availability Zones.
Well done, you’ve built a network in AWS for the company Cat’s Eyes using the web console! As you’ve seen, it’s quite a long process, and unless someone were right beside you watching what you did, no one would be able to replicate it or know what your network looks like. It’s also difficult to measure the impact of any changes, as you don’t have a general overview of everything that’s been done. It’s now time to start automating your network and go back through all the previous steps with a tool provided by AWS: CloudFormation.
