Structure Your Project
 Let's create our first complete app with React! 🚀 As we go through the course, we’ll work together to build a website for a freelance agency, Shiny. As you can see in the Figma prototype, this site has different features that you’ll work on as you learn the different concepts. Every project has to start somewhere, so let’s begin by setting up the app and learning about ESLint and Prettier!
Install Your App With Create React App
We’ll use Create React App (CRA) to set it up.
On your terminal, get into the folder where you want to create your project. Like in the first course, we’ll go into the workflow folder that sits on the same level as Downloads, Documents, etc., where I file all my code projects.
To start the project:
npx create-react-app shiny-agency
Great, isn’t it? 🤩
Structure Your Project Into Modules
Now that the project base is there, it's time to decide on its architecture.
Architecture? Even in front end?!
Don’t panic! It isn’t complex patterns. Instead, the idea is to follow logical and sufficiently clear rules to know where to put the files you create and find those you need in your codebase. React lets developers choose how to structure their projects. Check out their documentation on file structure.
In the chapter “Discover Create React App” in the previous course, we organized code by grouping files together by type: each file corresponded to a component located in the /components folder. CSS files were located in the /style folder, and so on.
We will organize files similarly here, except we will add a folder for pages, which will group the components to which each route returns (we’ll cover routes in the next chapter 😉).
Start by creating a /components folder and a pages folder in src . In /pages , put App.js , and rename it Home.jsx .
Don’t forget to update the import paths, i.e., in index.js :
import Home from './pages/Home;That gives you:
├── README.md
├── node_modules
...
├── package.json
├── public
...
├── src
│   ├── index.js
│   └── pages
│       └── Home.jsx
└── yarn.lock.jsx? Since when have we needed a specific file extension to code in React?!
You don’t have to use the .jsx extension. Your React file will also work well with a .js extension, but since you can use it, isn’t it better to make everything clear? Then you’ll see right away when your file contains React and when it doesn’t. 👀
The important thing is that you can find your files quickly. There's no one-size-fits-all solution when it comes to architecture, so you need to find a structure that works for you. Since there are fewer files, a structure by type should work well here.
That’s twice now that we’ve used the same structure – for this course and the one before. What other options are there?
There are various possible approaches. For example, when working with a complex app with lots of big features, you might group by feature. You can find a brief example of this sort of structure in the React documentation.
Another structure that has worked well over the past few years is creating and organizing components using atomic design principles, which makes collaboration with designers easier. However, since our app isn’t going to be very big, it seems unnecessary to use this structure. That’s why we’re going to organize the project for this course by file type, to make it more similar to what you would do within a company.
Now that you have the architecture, let's look at some tools to write cleaner code and avoid common errors.
Use ESLint and Prettier
JavaScript is very flexible when it comes to code errors or even just formatting—there’s no strict compilation that flags your errors. Luckily, there are tools to help with writing cleaner code!
Write cleaner code? Why waste time configuring tools when I’m managing perfectly well?
Well, you might be managing well working alone on a small codebase, but imagine that you’re working on a team, where each member has their own coding style (using or not using semicolons, different rules for indenting, etc.). It’s just not efficient. 🙈
We're going to use ESLint, which will flag errors in your code (style and basic coding errors that might lead to bugs), and Prettier, which will format it.
Secure Your Code With ESLint and Its Extension

Let’s start with ESLint.
If you look at your package.json , you’ll see that ESLint is already one of the tools that Create React App has preconfigured. This tool will flag errors in your code, such as using a variable that has never been declared.
Let’s try it out. In Home/index.jsx , add a line of code making a console.log of an undeclared variable just before the return :
console.log(thisIsAnError)Nothing in particular comes up. However, this is an undeclared variable, so it’s an error. 🤔
If you haven’t yet installed the ESLint extension in your code editor (IDE), nothing will happen.
Use VS Code to install the extension, which lets you install it directly in the Extensions tab (this will vary depending on your IDE). Once your extension is installed, your code editor should highlight your error, like this:
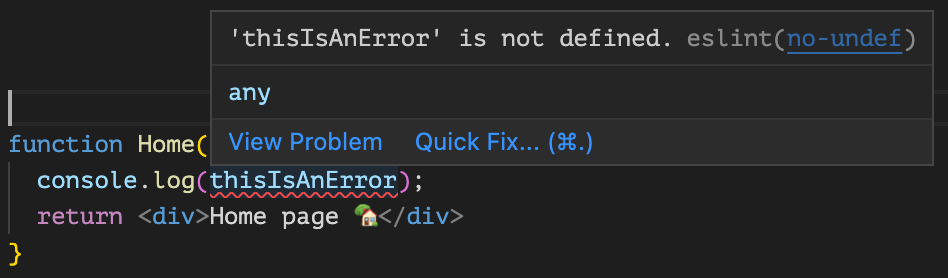
And there's the error!
The configuration is ready. Learn more about ESLint in the screencast below.
Format Your Code With Prettier
While ESLint flags errors in your syntax, Prettier is the standard tool for formatting your code. Unlike ESLint, Prettier is not automatically installed with Create React App.
To give you an idea of what this tool can do, take a look at this GIF 👇:
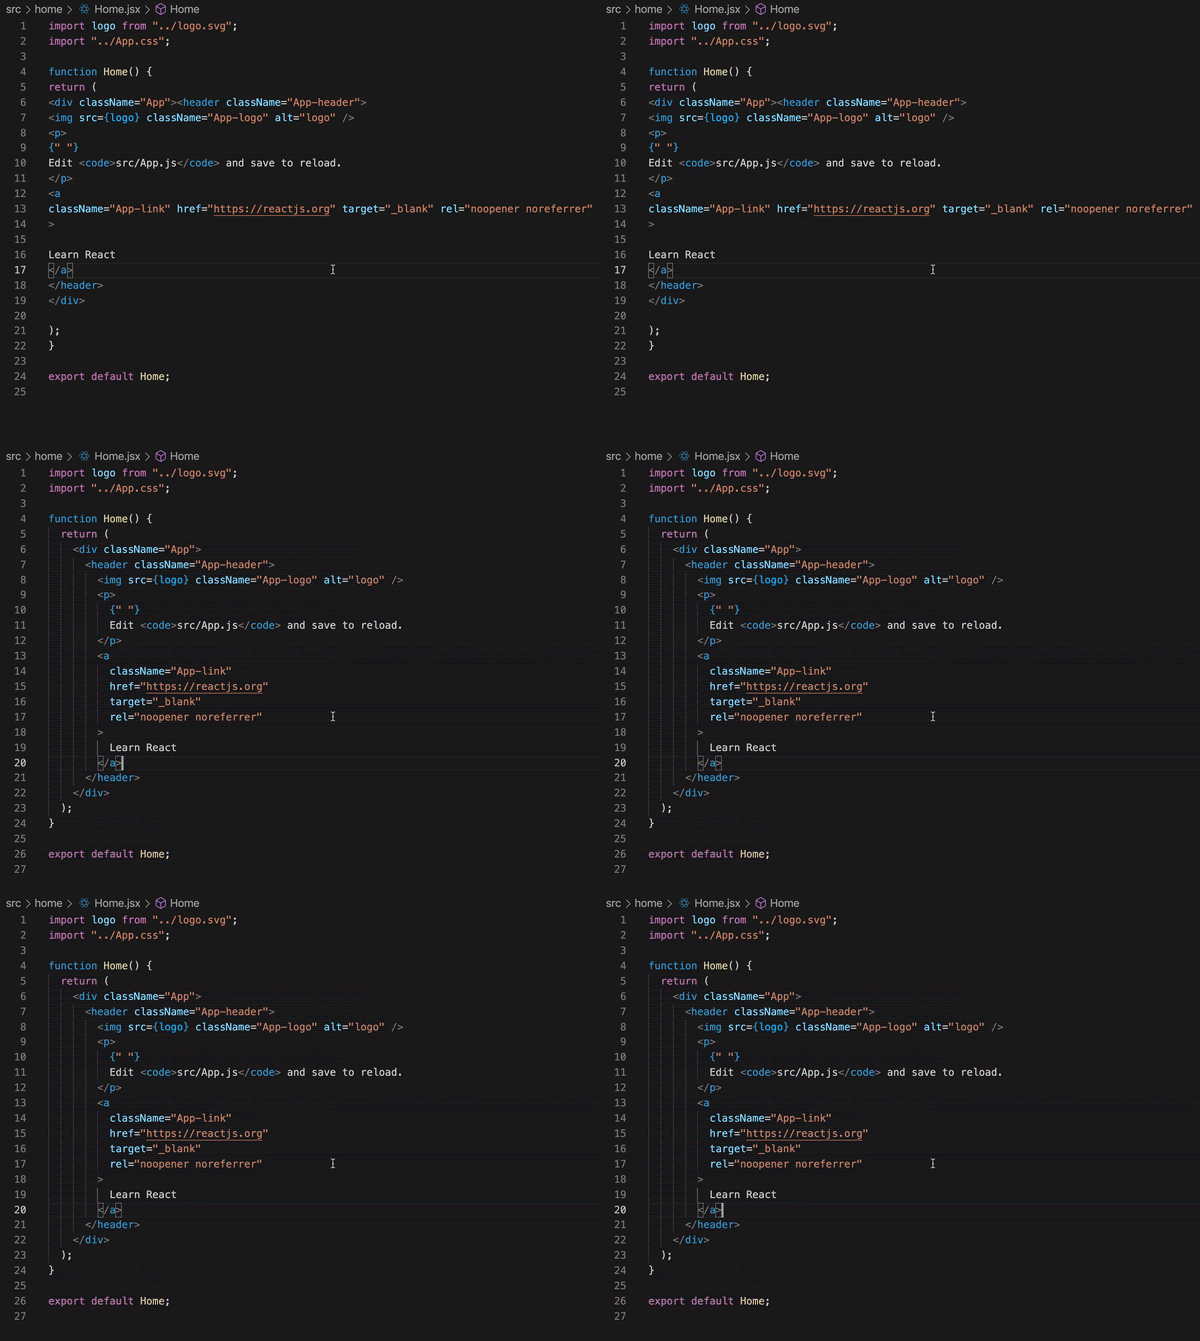
Let’s dive into the config. Start by installing the library on your terminal with yarn add -D prettier .
Ok, great – now what? 🤔
The tool is now installed, but you still have to run it manually. You want Prettier to do the work without having to think about it. The simplest way of doing this is to install the Prettier Extension directly into your IDE extensions.
Go ahead and install the extension in VS Code.
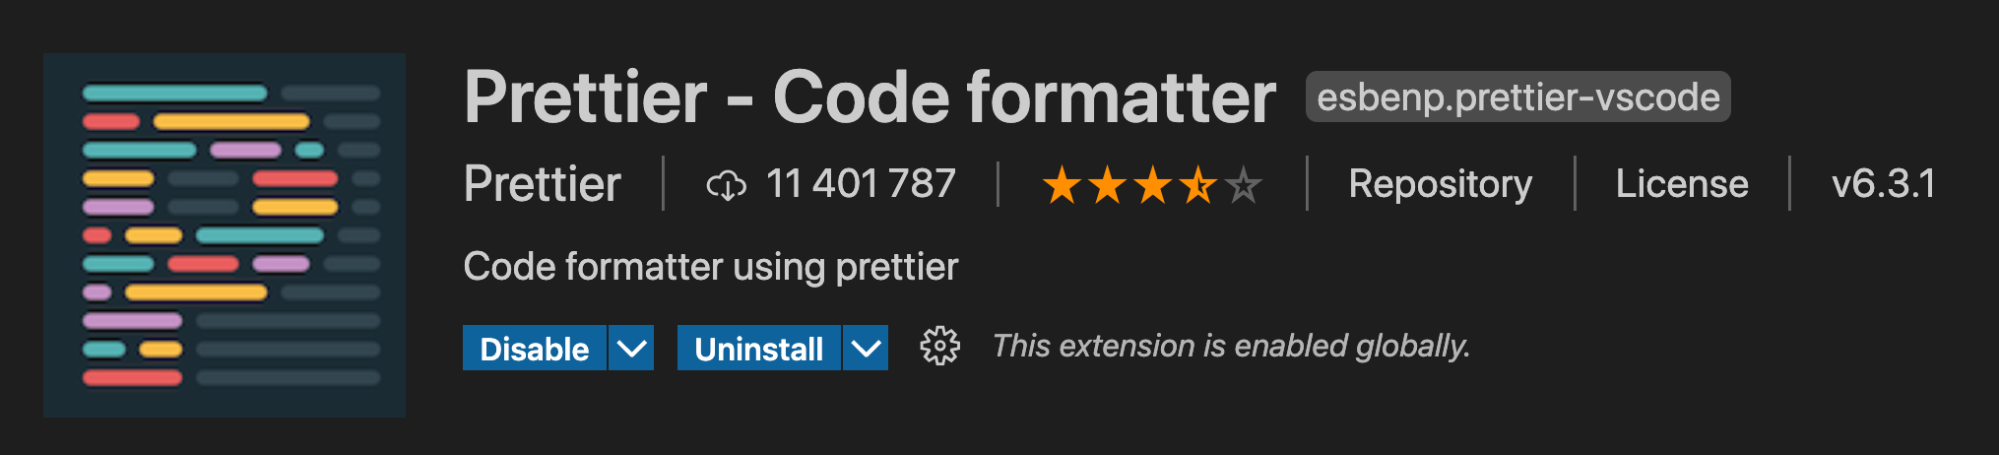
And then all you need to do is go to the settings in your IDE ( Code > Preferences > Settings ) to activate the command formatOnSave . This will now format the file every time you save. Amazing! 🎉
You could also go to the search bar in your IDE, type in “format,” and activate formatOnSave :

You're not done yet! You also need to activate the option that avoids indiscriminate modification of all of your files.
Type in require config and scroll down to the setting for Prettier. Activate the setting like this:

This way, you can specify that VS Code should only format a file when a Prettier configuration is present.
So let’s make one!
At your project root, create a .prettierrc file in which you’ll be able to set certain rules (read the Prettier documentation to learn more). So, for example, if you want to delete all semicolons, you’ll do the following:
{
"semi": false
}
If you go back to your Home/index.jsx file, you have:
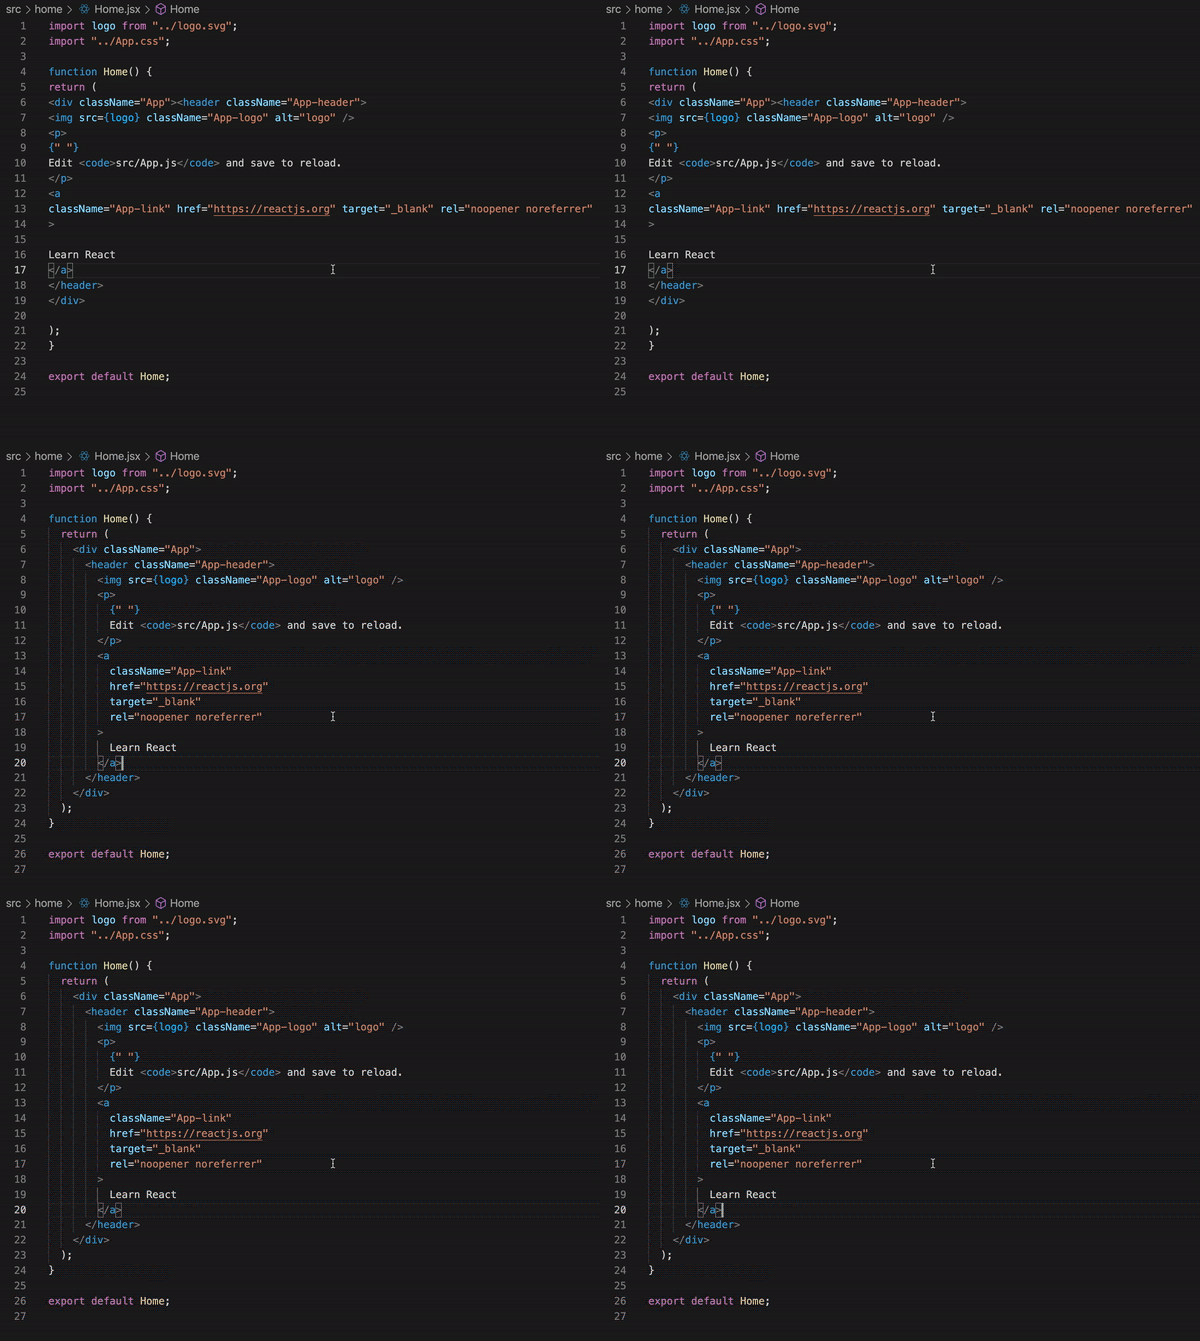
Congratulations! You have just successfully configured ESLint and Prettier with their extensions, and now you no longer have to worry about formatting your code or making inadvertent errors! 🤗
It’s now time to put this all into practice!
Give It a Go!

For this extended exercise, you're going to create a website for the freelance agency Shiny.
Here are the first steps to create your project's codebase:
Set up your project with Create React App.
Rename your index.js file at the
/srcroot asindex.jsx.Create a
/componentsfolder and a/pagesfolder in/src.Move the App.js file to
/pages, create a/Homefolder and rename it inindex.jsx.Delete the files that aren’t useful to you at the moment.
Install and configure Prettier so that you get:
{
"semi":false,
"singleQuote": true,
"tabWidth": 2
}
Modify the JavaScript files according to the style defined in
.prettierrc.
You’ll find the solution for all of this on the GitHub repository for this course, on the branch P1C2-Solution.
Let’s Recap!
When starting a project, it’s important to give some thought to its structure.
ESLint is a tool that flags errors in your code. Combined with its extension in your code editor, it will allow you to spot your errors instantly.
Prettier is the standard formatting tool that makes it easier for teams to work together on a codebase.
Did you enjoy setting up your project, organizing it, and using essential tools for working with a company? Good, because in the next chapter, you’ll learn how to secure your props with PropTypes!
See you there! 🚀